
You have arrived at Reaper’s Coast, where you have to discover how to master your powers and unlock your full potential as a Godwoken. (Main quest: Powerful Awakening).
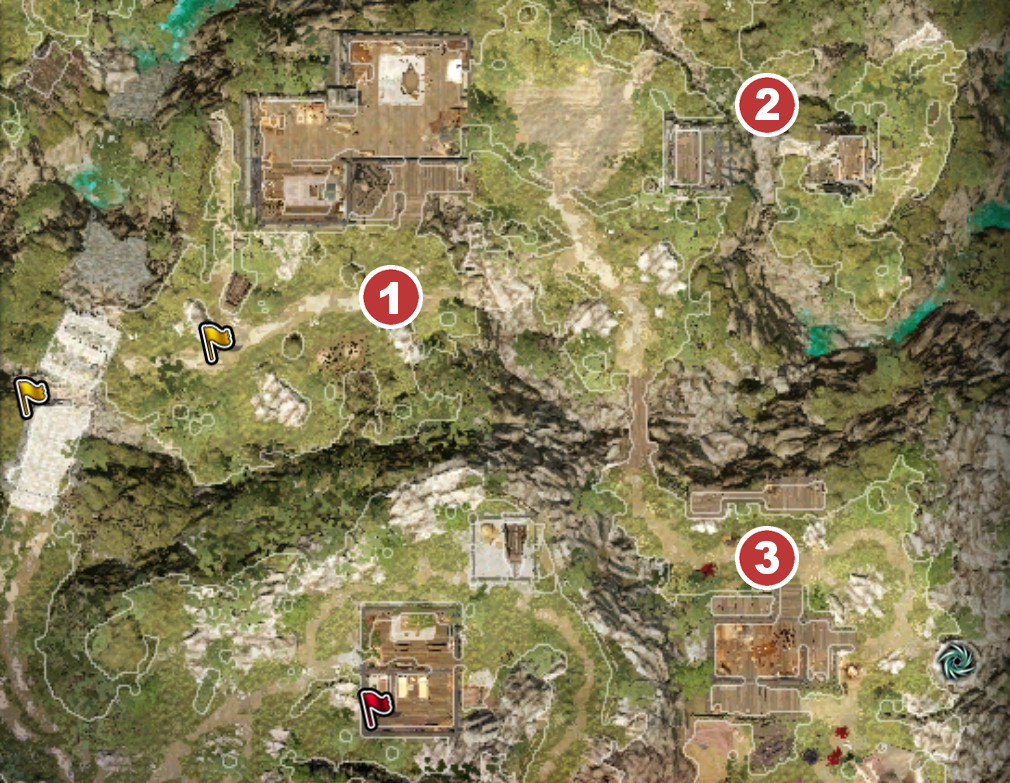
Explore the Beach to the west and you will find a dying shark that escaped the sea in fear of some kind of monsters. You can talk to it with Pet Pal. You can decide to kill it in mercy and loot a human limb, it's needed for the quest Hide and Seek you will get in Driftwood.
On the east side, along with the river, you will find a child at the drawbridge crying for help. If you agree to help him you will get the They Shall Not Pass quest where you have to go around and lower the bridge at a later stage.
Along the street, there are some Voidwokens that have attacked a magister caravan. speak to the magister survivors to acquire The Wrecked Caravan quest where you need to report to the magisters at Driftwood later.
Further down the road, you will find a chicken farm to your right, you can talk to them and acquire Counting Your Chickens quest with the Pet Pal talent. The Hens ask you to kill the Voidwokens further north alongside the eastern river and bring them one of their eggs back.
On the left side, you find the main gate to Driftwood but you can go a bit further to the north and save Meistr Siva from the Gallow. You have to persuade the magisters guarding her to leave because fighting them gonna be hard (they will call backup). She will take you to her home and teaches you a very useful skill called Spirit Vision (very important for a lot of quests) and will be your main go-to person for the Powerful Awakening Main quest. There is also an unlimited source fountain in her basement where you can refill your source points!
Driftwood
In Driftwood, talk to everyone and do a good chunk of the quests before you leave again.
Click the link for more details:
- Grebb the Scholar
- Hide & Seek
- A Web of Desire
- Drowning her Sorrows
- The Snoozing Adventurer
- Strange Cargo
- Love Has a Price
- The Driftwood Arena
- The Missing Magisters
- Red Ink in the Ledger
The Magisters will give you quest The Law of the Order while dwarves, found in the Undertavern, give you Shadow over Driftwood. Both quests will lead you to Wrecker's Cave to the west. The Aggressive Takeover quest can be acquired by talking to Garven in the Driftwood Tavern and will set a marker in that area as well. The Powerful Awakening Main quests require you to find powerful sourcerers that can increase your source and one of them can also be found inside Wrecker's Cave. This is where your adventure should lead you next.
If you don't know what to do or where to go first you can explore the areas that fit your level (see map below)
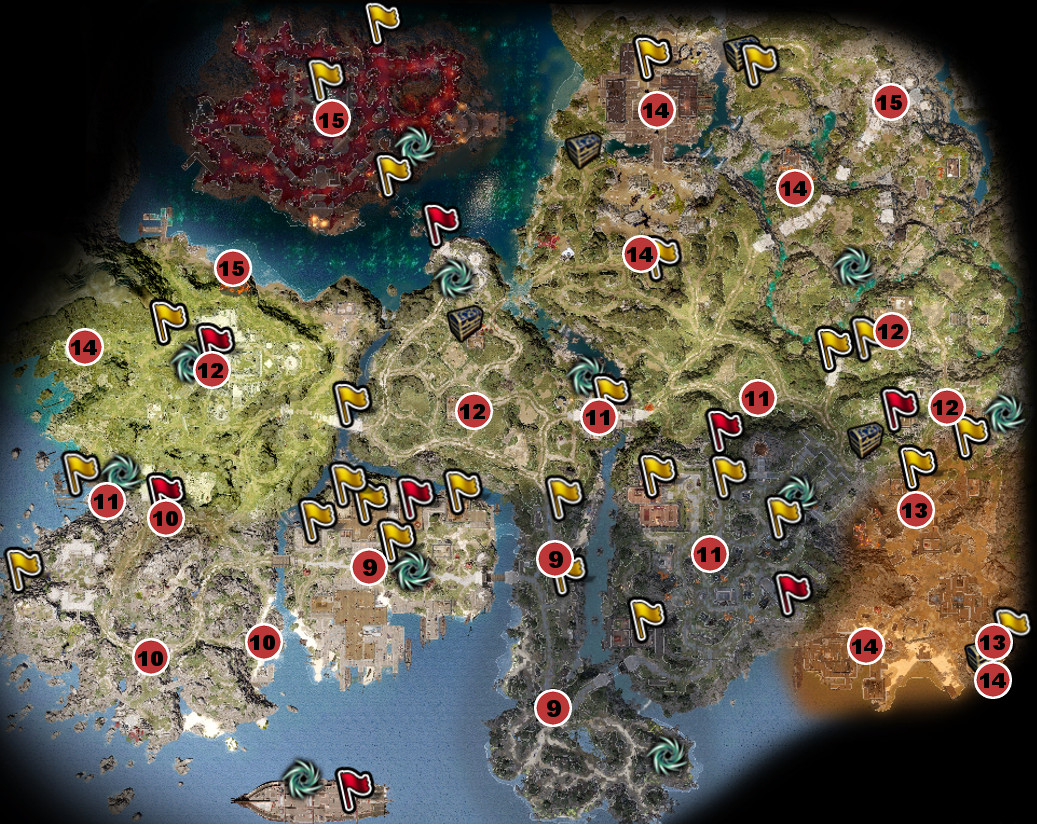
Reapers Coast: Suggested Levels
Reaper's Bluffs
When you leave Driftwood the west you will find some magisters with their source hounds that will smell your source. Try to talk yourself out of this situation or you have to fight them. If you run to the south along the beach you will encounter Lagan who lost his wedding ring. You will get into a fight against Voidwoken when you try to retrieve it. (Lost and Found)
From the Driftwood bridge go straight west and you will be ambushed by possessed dwarfs on 2 occasions. Kill them and loot everything. Be aware of traps near explosive barrels and vines. The first ambush will be on a broken bridge where you can climb vines that will lead to dwarf camp to the north. After the second encounter with the possessed dwarfs, climb the mountains to the south until you reach a beach where you gonna find an ancient lamp, which gives you Wishful Thinking. If you keep walking on the mountain path you will find a statue where you have to lit all torches at once (The burning Prophet). Be aware of traps if you keep going north on that mountain path.
Further north is a castle with a bit more difficult enemies. It's advisable to approach the castle on high ground to give you some tactical advantage against the possessed dwarfs. After you have cleared the castle, you can go further north and you will find a troll that will give you Business Rivals where he wants you to kill a troll on another bridge. He asks for a ridiculous amount of money for letting people pass his bridge. Don't fight him since he will probably kill your whole group, instead, search for a blood trail that will lead you to the missing supplies you need to find for the Aggressive Takeover quest. Loot the supply box there, then cast Spirit Vision to talk to Garven's partner. He will accuse Graven of killing him. Decide if you want to help him or not.
After this is done, enter Wrecker's Cave to the west of these castle ruins.
Wrecker's Cave
Inside the cave, you will find one survivor you can talk to. If you keep exploring you will get ambushed by Voidwokens that will take you and your party members to the depth of the cave, separated. If you want it easy, right before you get ambushed, you can dig up a secret tunnel leading to the depth of the cave without separating your party.
Secret Tunnel entrance
Note: You can still use a shovel on the spot if you cant discover the dirt mound
Progress through the cave (see Wrecker's Cave) until you find Mordus and his henchman. If he gets a source point from you then he will transform into a huge Voidwoken and may completely die in this form. Try to focus him down as fast as possible so he survives and can teach you source, which is the first step in completing the Powerful Awakening main-quest. Mordus will also give you an amulet you can use to open a hatch in his room where you will find a gem that will open a secret passage in his house in Driftwood. (A Taste of Freedom)
Go back to Driftwood and buy new spells and progress your main quest by talking to Meistr Siva and repeating the ritual again. don't worry if you are missing the blackroot you need to perform the ritual. You will find a lot in the Cloisterwoods you will go next.
Leave Driftwood to the east gate and follow the path north until you come across a bridge protected by paladins. Talk to everyone and keep going until you reach the Stonegarden.
Stonegarden
When you arrive at the Stonegarden, cast Spirit Vision as much as possible since the place is full of spirits you can talk to. Explore everything and try to do the sidequest.
Before you enter the graveyard, approach the house right in front of the gates and talk to the healer Swann. He will tell you about a sick young woman whom he's tending to in his cellar. see (A Danger To Herself And Others).
Stonegarden: Quest locations
- Tarquin asks you to investigate his family grave and get something for him. (All in the Family)
- Cast Spirit Vision here and you can talk to a Lizard that was buried in the wrong part of the graveyard. Dig up his remains and burn them in the lizard part of the cemetery. (Stranger in a Strange Land)
- A buried philosopher you can battle for some experience and a skillbook. If you don't have an undead in your party then you need to get 3 books from Ryker's house first. see An Existential Crisis.
- The graves of the four heroes. Examine them all to get their treasures marked on the map. They will rise as undead and attack you when you have examined the last grave. (Heroes' Rest)
- The dog named Andras guarding this place is actually a necromancer and protecting his master's grave. Talk to him with pet pal and you can fight him for some loot. Inside the crypt, there is a petrified sourceress named Qauna. Unpetrify her with bless and kill her to get the key to Tarquin's family crypt. (All in the Family)
- In this area, use Spirit Vision to reveal a spirit that is hostile to the tree. As Sebille, use Source Vampirism to consume the spirit and Sebille will be transported to an area where you can kill some enemies for unique loot. You can use Teleporter Pyramids to transport the rest of your party to this area to help in the fight.
- The lizard part of the cemetery: There is a chest between two fire-breathing dragon statues. Teleport it out of the fire and talk to it with a lizard character. The required password can be obtained from the lizard in Rykers Mansion (Speaking in Forked Tongues). Alternatively, you can just destroy the chest to get on the loot. Speak with the spirits there, especially if you have The Red Prince in your party.
- Tarquin's family crypt. You need the key from Qanna to get in here (5). There are two buttons hidden in the first room that you need to press in order to open the Stonegate. In the 3rd room, activate the pressure plate with one party member. Cast Spirit Vision to see the 3 levers and press them (middle-left-right) to reveal a secret hatch. See All in the Family.
- Gravekeepr Farimah wandering around, she asks you to kill Ryker and free his servants (The Reluctant Servants).
- Ryker's Mansion. Ryker can teach you source (Powerful Awakening) if you bring him a tablet from the Blackpit mines (A Generous Offer and The Midnight Oil). Explore his basement where you can get the quest Opposites Attract if one of your party members has the Pet Pal talent. Besides that, there is nothing you can do in his mansion yet.
- There is the bridge back to where you started the Act. There are some Voidwokens that you have to kill to save the mother of that crying child that gave you the They Shall Not Pass quest. Kill everything and lower the bridge to Driftwood.
- If you have Pet Pal then you can acquire a nice summoning skill Summon Condor when you speak to Featherfall (X:582 Y:198 between (1) and (2))
Go back to Driftwood when you are done in Stonegarden. Buy some new spells and equipment and leave Driftwood to the west gate and then run to the north to get to the Cloisterwood.
Cloisterwood
Inside the Cloisterwood, you will come across Eithne (X:168 Y:223) who will ask you to find a tome that teaches the reader how to make corpses explode (Eithne the Trader). Pick up at least one Blackroot that is growing here since you will need it later for the main quest.
If you set the Lich in A Taste of Freedom free then you will find him feasting on innocents. Fight him and either finish him or spare his life and you will encounter him again near the Cloisterwood ruins. (that fight may be a bit too hard at your current level)
Enter the Ruins near the Cloisterwood Waypoint where a sourcerer named Hannag is fighting against magisters. She is another one who can teach you to hold more source (Powerful Awakening). Kill the magisters and talk to her. She will ask you to help her apprentice (On The Rope) who was last seen in the Blackpit area, in exchange, she will teach you about source.
North-east of the ruins, you will find the demon hunter's house. He is important for Lohse's personal quest and will give you A Hunter of Wicked Things.
If you keep exploring the area you will come across a burning witch in the north. Don't engage her yet because you are probably way below her level and she will just delete your party. You have to revisit this area later when you are around level 15.
The same goes for Lamenting Abomination you will find to the northwest. He will summon several wolves with vampiric aura and is with level 14 probably too strong.
There is another bridge with a troll to the east, but this troll asks only for 3gp to let you pass (Business Rivals). Another way over the river is a fallen tree right east to the demon hunter's house. Both ways will lead you to the Driftwood fields. Make sure that you have picked up some Blackroot otherwise you will have to backtrack later.
Driftwood - Fields
There are two quests that can be found in the Driftwood fields and both require Pet Pal to acquire:
Driftwood Fields: Locations
- You will find an ill-looking chicken called Ferno. Talk to him and with the [Scholar] Tag reveal that he is actually a phoenix. Set him on fire and take the phoenix egg to end this quest. (The Ugly Little Bird).
- At a farm north of Driftwood, you will encounter two cows that are actually people and got polymorphed and enslaved by the witch. To help them, find the indigents for the witch's portions that can be found inside the Witch's house (Treated Like Cattle).
- The Witch's house. The key for the front door can be found south of the house. The lock for the cellar door needs either be lockpicked or you have to kill the Witch (level 15) you encountered in the northern part of the Cloisterwoods (Treated Like Cattle).
- Tip: Respec on the Lady Vengeance and come back with some points in thievery to open the hatch.
- There is also a fight against some scarecrows on your way back to Driftwood.
Now we have two options to get a teacher to increase our source on more time (Powerful Awakening) and both will lead us to the Blackpits:
- Bring Ryker the tablet he wants from the Blackpit mines. (A Generous Offer)
- Find Hannag's apprentice in the Blackpits. (On The Rope)
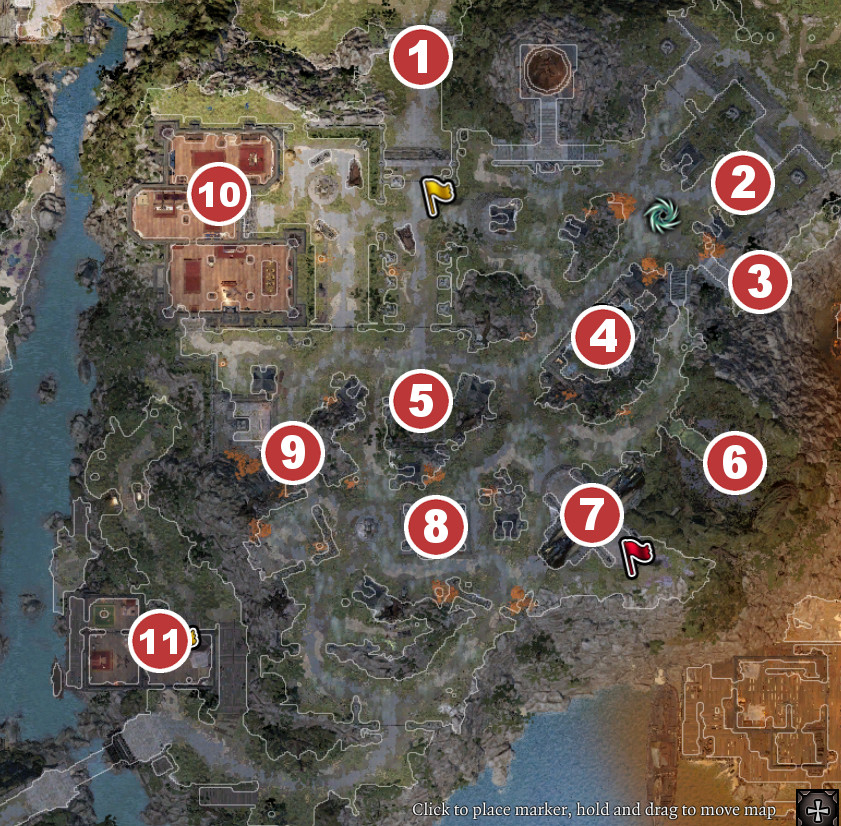
Blackpits - Gates
Blackpits - Gates: Locations
Go northeast from the Stonegarden waypoint and you will enter Paradise Downs.
- You will find Gareth mourning his dead parents (Burying the Past). He asks you to take care of the Silent Monks inside his childhood home. Either persuade him to let go or help him to get revenge by killing the murder of his parents. You can talk to them inside the house using Spirit Vision and you can find Jonathan's Gloves laying near a tree just outside the farmhouse.
- Just some hidden chests you can find around here. Use teleport to get across the cliffs and don't forget that you can also teleport objects right to your feet.
- The Voidwokens are attacking some Magisters. It doesn't matter if they survive or not.
Go past the waypoint and enter the Blackpits.
Blackpits
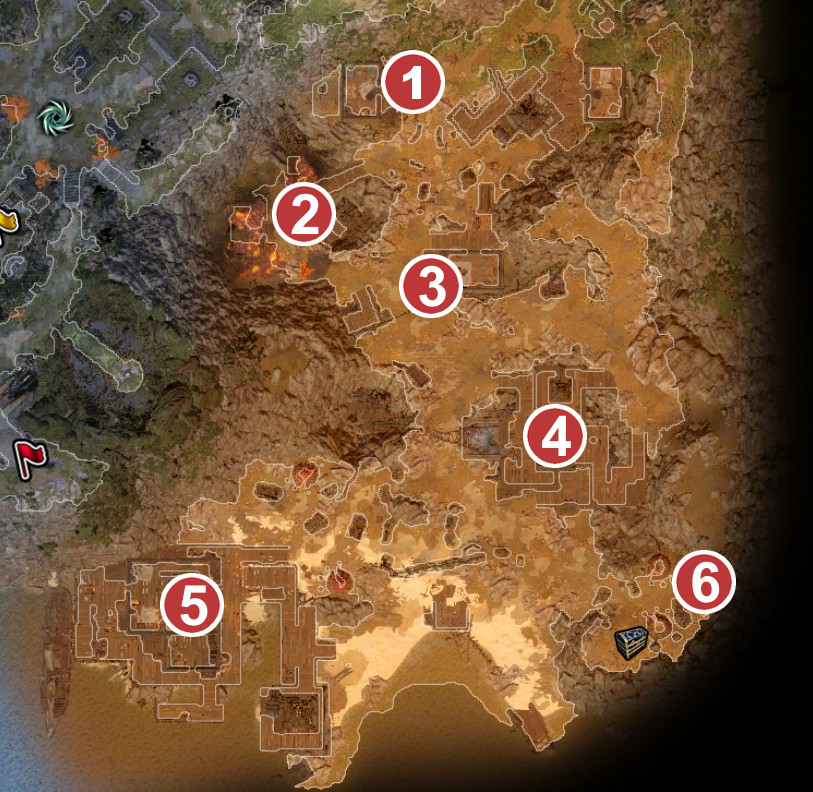
Blackpits: Locations
-
The house of Hannag's apprentice where the magisters are about to execute his whole family (On the Ropes). If you want to save them all you have to step in asap and fight the magisters, but this is not an easy fight.
-
Tip: Start the dialog with your melee character and position your range characters on that wood platform to profit from the range increase and damage bonuses.
-
-
Some magisters are burning down a house with a suspected sourcer inside. Persuade them to let you do the talking with the alleged sourcer (No Way Out).
-
A gate guarded by magisters. show them the pass you got from magister Reimond in Driftwood or fight them. Alternatively, talk to the women just left of the gate. She will show you a key and you can progress through a hatch to the other side of the barricade.
-
You will find the white magister Jonathan interrogating Hannag's apprentice, Gwydian (On the Ropes). If you did not fight the magisters in the prior section then they won't be hostile. Otherwise, the battle will start immediately and Gwydian will set himself free. If you want that source point from Hannag then you have to make sure he survives that fight.
-
Oil Voidwokens will appear after a few rounds and spill oil everywhere. Cast Rain to drain it away.
-
Burning Voidwokens will appear after a few more rounds setting everything on necro fire. Don't cast rain when everything is already on necro fire since it will cause the decaying debuff resulting in healing spells damaging your party members.
-
It's advisable to rush to the top of the wood construction and defend from there.
-
Gwydian will run through the necro fire like an idiot. Keep your eye on him.
-
You can also try to teleport Gwydian down to you and keep your distance so Voidwokens and magisters can have fun with each other.
-
You can remove necro fire with Bless (make sure it's not connected to a Voidwoken otherwise it will just turn into necro fire again. Use skills like Battle Stomp to put out the fire and bless the section your party is standing on)
-
-
The Harbor where the Magisters (level 12-16) interrogating some Blackring members. If you are at least level 14, you can try to climb the ladder to the most southern point and sneak behind the Shrieker. You have no other choice but to fight the magisters. Kill them all and read the notes, talk to the spirits or eat the limbs as an elf to get information on what happened here. If you manage to save the Blackring members alive then they will help you a bit in act 3. (Dark Dealings in the Blackpits).
-
The entrance to the Blackpit mines, which is guarded by quarter mistress Anna who you have to kill in order to enter the mines (level 13-14).
Before you enter the mines you should go back and speak to Hannag and get that 3rd source point (Note: She will remove the Pet Pal talent from your character! Talk to her with a party member who hasn't that talent or respec out of Pet Pal on the Lady Vengeance so you won't get a talent point stolen from you). Do the ritual (Powerful Awakening) again and acquire source spell Source Vampirism that will be handy at a point inside the mines.
don't worry if you don't have the 3rd source point yet. You will get another opportunity after you finished the Blackpit Mine.
3rd Source Point
You will learn Source Vapirism on your 3rd visit to the Hall of Echoes after you beat 2 Voidwokens. It's basically Purge with a very short range and allows you to consume spirits for source points and condemn them to the eternal void, so be careful when you talk to spirits.
Back in the real world, you will find Meistr Siva dead - killed by Voidwokens. Take the note with the combination from their body. You are now powerful enough with 3 source points and the main quest (Powerful Awakening) is basically completed. Theoretically, you could already leave for Act 3 but it's highly recommended to do all the party member-related quests and be at least level 16.
The 4 other teachers will give you now a high-level source skillbook instead of another source point if you accept their teachings.
Blackpits (Revisit)
Once you are back, progress through the mines and get that tablet in the ancient temple you will come across. see Blackpit Mine for a detailed walkthrough.
Visit the Paladins near the Paladins Bridgehead waypoint, after you have explored the Blackpit harbor (level 14-16) and the mines to finish the quest Dark Dealings In The Blackpits. You will have to fight some enemies there.
Stonegarden (Revisit)
Once you have obtained the tablet from the Blackpit Mines, you can go and visit Ryker again in his Mansion. He will be in his private chamber you can enter through a hatch you find in his reception room. You don't have to give him the tablet in order to make him teach you where he will sacrifice some farmers' souls to grant you more source points. You can double-cross him since most dialog options will result in a fight against him anyways and the tablet can be used for another quest (Almira's Request).
After you killed Ryker, make sure that you get the 3rd Teleport Pyramide from a room behind a door without a keyhole. In order to open that door, pull a lever near where Ryker was standing right next to a mirror.
When going upstairs again you will see that all of his servants are gone and you can now fully explore his house. Some minor quests you can do now in his house:
-
You will find a giant spider in one of the rooms on the 2nd floor. You can feed it legs and get some items or just kill it for EXP.
-
Decide which one of the pets were loved by Ryker more (Popularity Contest)
-
In case you don't have an undead you can now get the 3 books in order to win the battle against the undead philosopher you dug out in Stonegarden (An Existential Crisis).
Talk to Gravekeepr Farimah, found wandering around Stonegarden, to complete The Reluctant Servants quest.
The next stop will be the region around the sawmill, which is important for a lot of personal quests (Ifan, Sibille, Red Prince)
Sawmill Region
Sawmill Region: Locations
- Some deer will attack you after a dialog. Pray to the altar to get the quest The Three Altars
- The Elven Encampment. You need either; an elf in your party, an undead that can transform into an elf, or you can rescue Saheila you can find inside the sawmill (if she has survived act 1). Join them and show your respect to complete the quest Burial Rites.
- 4 elven statues where you can solve a small riddle. see A Trial for All Seasons for the solution.
- Another Altar you can pray to. (The Three Altars)
- A lot of traps and some spirits you can talk to.
- The Sawmill, where the lone wolves have their base. You can enter peacefully if you convince them that you are a trader or you have Ifan in your party, otherwise, you will have to fight them prematurely.
- The Red Princesses encampment. Talk to her with the Red Prince and let things happen.
Sawmill
Quests you can find in the sawmill. Most require you to use Spirit Vision and talk to the Spirits.
- The Bark's Bite
- The Stoic Spirit
- Old Flames
- Press-ganged
- A Prize Kill
- An Eye for an Eye
- Bitter Tonic
- No Laughing Matter
- Finder's Fee
Your main target is Roost who you will find upstairs and is part of Ifans and Sebilles personal quest. He is guarded by 2 of his henchman and a wolf that you will have to fight then regardless of your dialog options. Kill everyone and search for notes and interact with the black mirror you fin in that room. If Saheila survived Act 1 then she will be sitting there in chains. Free her and escort her back to the elven encampment but be careful because all the Lone wolves will be hostile now and you have to kill them if you haven't already. After that you can do as many sidequests as you wish by talking to all the spirits you are finding here.
Loot the key from the Trunk mixer that will open the gates to the northeast. There are a lot of annoying traps, so be careful. If you keep going will come across another heroes' treasure and come across the Red Princesses encampment that is very important for the Red Prince's personal quest.
besides the Red Princesses, there is nothing really interesting. Move to the south, climb down some vines and teleport/jump to the burning house to enter Paradise Downs. Prepare for getting ambushed.
Paradise Downs
Paradise Downs
There are some chests and bodies to loot in this region and another option to increase your source if you haven't 3 points already.
- You will find a succubus called Almeria who will ask you to defeat the Harbinger of Doom (Unlikely Lovers).
- Harbinger of Doom (level 15) that you have to kill for her. She will also ask for the tablet you got from the Blackpit Mines to break with the covenant. In return, she will increase your source (or give you a skillbook if you already have 3 SP) and will move to the Lady Vengeance.
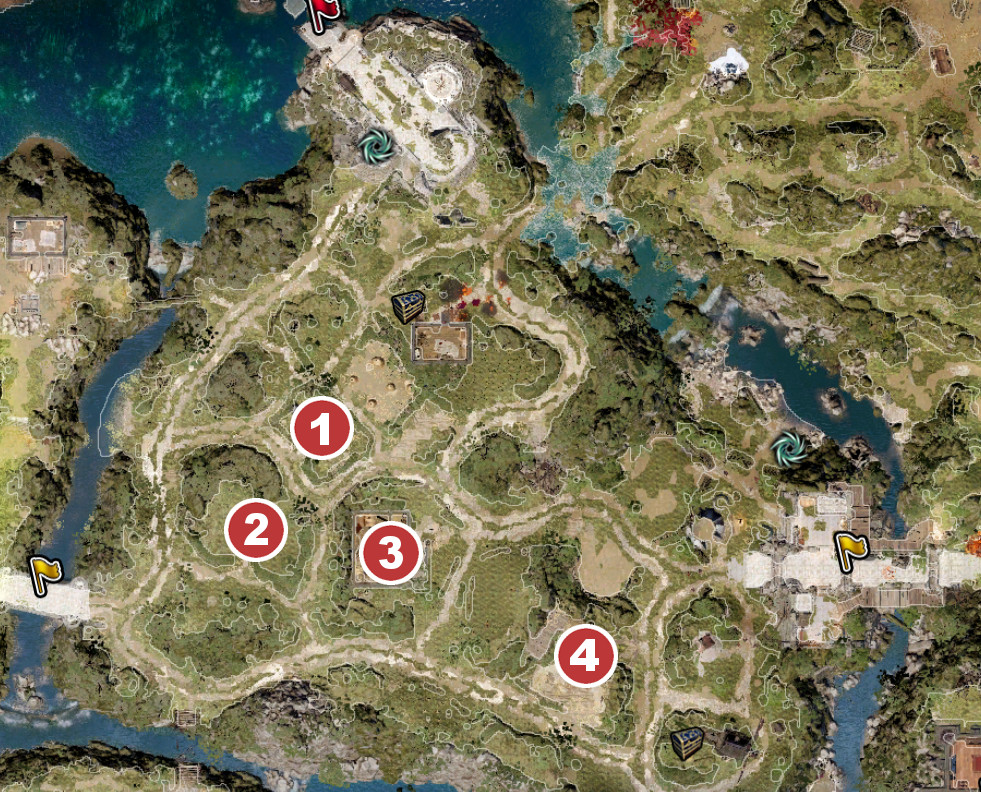
Cloisterwood (Revisit)
Remember that Lamenting Abomination (level 14) and that burning witch (level 15) you saw in the Cloisterwoods? You should be strong enough to engage them now. The Lamenting Abomination is guarding the last altar of The Three Altars quest. The Witch has the key for the hatch you found in her house just north of Driftwood (Treated like Cattle).
Bloodmoon Island
The Bloodmoon Island is the last part of Act 2. You can enter it through two ways:
- Over the broken bridge near the Driftwood fields waypoint. Cast Spirit Vision and teleport across it or use Spread Your Wings to jump back and forth between the bridge supports to cross it. Be careful of traps that are at the center of each platform.
- Through a boat that can be found north of Cloisterwood. You need to be at least one undead party member that can survive the death fog.
If one of your party members has made it onto the island you can use the Teleportation Pyramids or the Waypoint to reunite your party again. Don't approach the center of the island before you haven't talked to The Advocate first, otherwise, you will be confused.
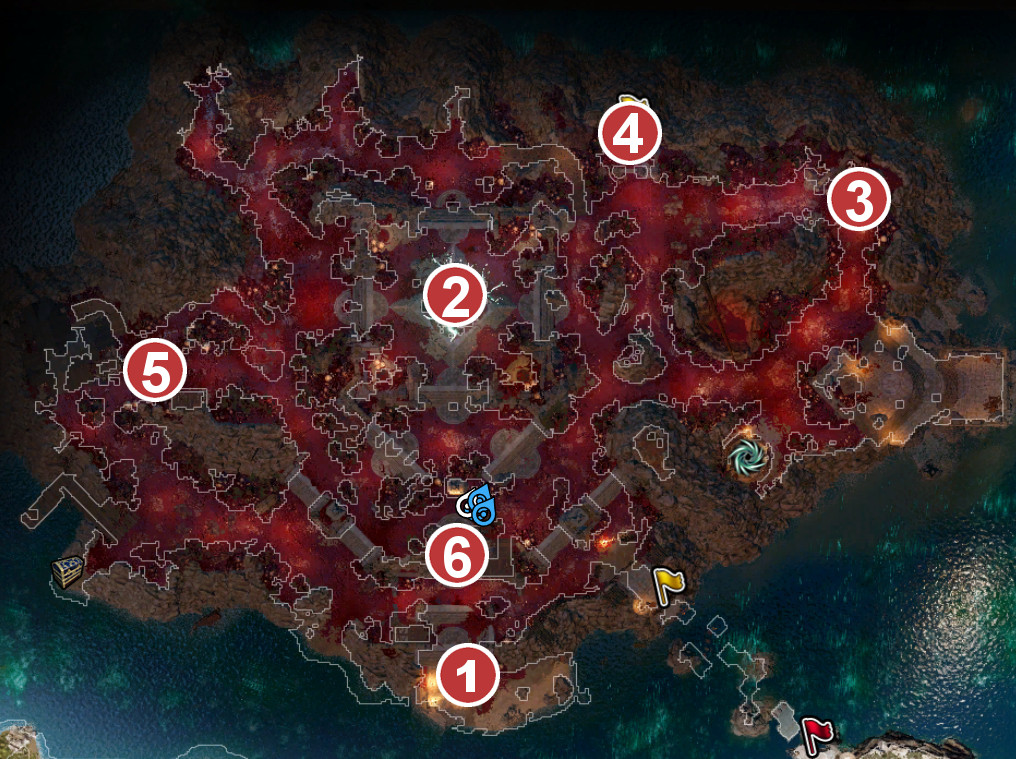
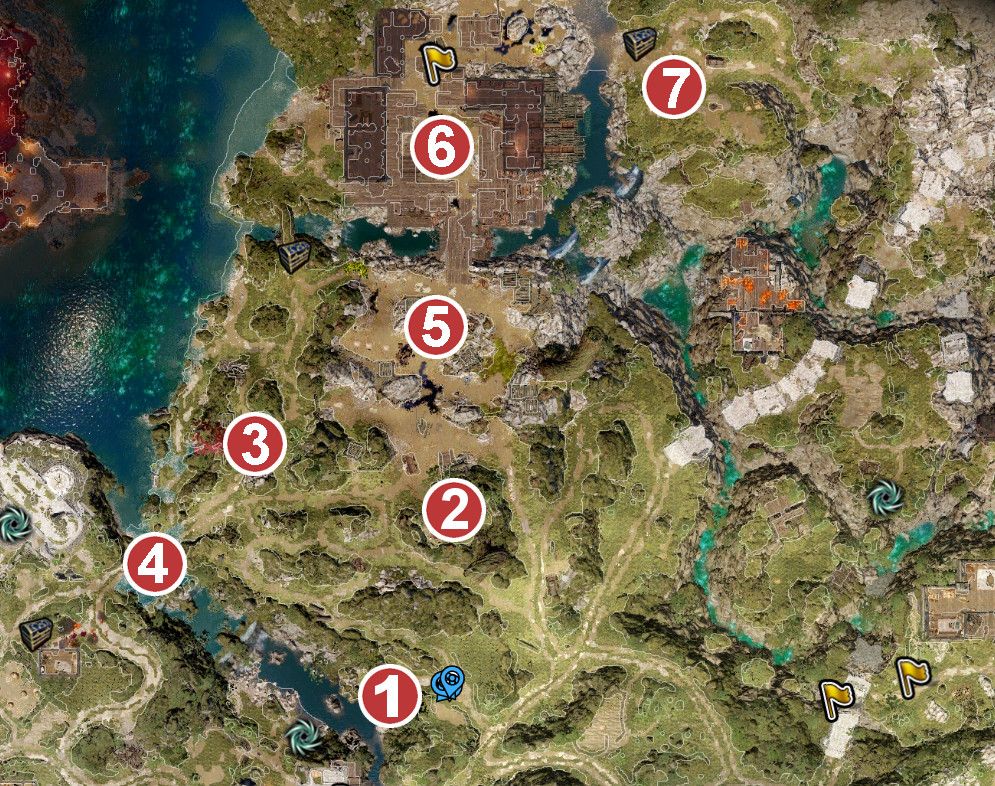
Bloodmoon Island Locations
- The Advocate, who will ask you to remove the black ring forces near the ancestor tree in the middle of the island. He can increase your source by sacrificing some tortured prisoner. (The Advocate)
- The Ancestor Tree, which is guarded by 4 Black Ring Magisters.
- Attack and defeat them.
- They will summon two Bone Smashers and an Undead Black Ring Destroyer that has a lot of HP.
- After you have killed them, The Advocate will spawn and thank you. If you want to complete the quest A Hunter Of Wicket things and Lohse's personal quest then you have to kill him as well. Both fights shouldn't be a problem.
- Cast Spirit Vision and talk to the tree. It will ask you to say its name that you will find in the archives. Talking to the Black Ring spirits will give you the (The Secrets of Bloodmoon Island) quest.
- Attack and defeat them.
- The Archives. You will have to dig up the entrance first. Once inside cast Spirit Vision and talk to the spirit of the Archivist and find the Archivist's Journal and read it to find out the name of the Ancestor Tree is Eleanessa.
- Another important book there is called Ornate Hymnal, which is needed for The Forgotten and the Damned quest.
- There is a hidden stone door in that room. You will need quite an amount of wits to be to interact with it. Inside the hidden room, you will find the Unusual blade. A lizard party member can translate what it says. (All In The Family)
- There is also a Tenebrium chest here that will sap one source point if you interact with it. It contains the Green Pyramid!
- The only way to open the chest is to lockpick it. (respec on the Lady Vengeance if you don't have enough thievery)
- There is also a Tenebrium chest here that will sap one source point if you interact with it. It contains the Green Pyramid!
- The Ancient Forge where you can smelt silver bars into levers that you will need soon. One bar is right next to it and another one can be found east of the waypoint. Just put the silver into the forge and press combine.
- A bunch of enemies that you can kill for exp.
- There are 3 Statues. Decipher the Ornate Hymnal (The Taming of the Holy Fire) book with a party member that has the [Scholar] tag and sing the song to the statues. Each statue will reveal a vault with its own quest (The Forgotten and the Damned). You need at least 2 silver levers that you can make at the Ancient Forge. See the quest pages for a detailed walkthrough:
Finishing the 3 quests will also complete The Secrets of Bloodmoon Island and The Forgotten and the Damned quest. Talking to the tree and telling it its name will give you the Doctor's Orders quest. Talk to Jahan again to finish the A Hunter Of Wicket things quest and get to know that the doctor is hiding in Arx (act 4) and the name of the demon that is possessing Lohse.
The End Of Act 2
You successfully developed enough powers in preparation for claiming the mantle of Divinity. The next destination will be a place known as the Nameless Isle where you will have to prove yourself as the Godwoken.
If you are ready to leave Reapers Coast, go back to the Lady Vengeance and interact with the ship figurehead to summon Malady. You should be at least level 16 and have done all party-related quests before you move on to Act 3 (Malady will give you a hint if you still have something important to do).
Feel free to give some suggestions in the comment section below.