
This guide was written by Drakus. You can read the original guide on the divinitiy original sin 2 steam community hub.
The Hold
This is where you will start after Character Creation (Maybe not for undead or Fane, Unsure yet). You'll be collared which prevents Source Magic before your character even wakes up. But this is only the beginning.
I will not be including the personal quests of the Origin Characters in these sections but will make note of specific places where if you have an Origin Character on your team, you might need to be aware of certain things.
Regardless, you should start talking to the Magisters on the boat. Except for Payde, do not talk to him yet. You can loot the areas you can get to including barrels and such to trade for things you do want. Like starting armor, or weapons, or healing items. However, unlike the Early Access, NPCs do NOT retain everything you trade to them. So keep the important stuff in your own inventory, such as your backpack, resurrection scrolls, healing items, and perhaps most importantly at least one Bedroll.
Once you are done with that, decide if you want to kill the magisters or not. If you do want to kill them, you can be sneaky about it and close the doors allowing you to pick off Waters and Siwan without the others noticing, then possibly take on Cadoc and Marel at once if you are feeling brave, before trying to take on the larger group in the main Holding area.
You could additionally open the door next to Payde by talking to him, and once all the Magisters are aggroed run in and bring Windigo into the fight. She will immediately kill all the magisters except for Siwan. Regardless of how you handle that situation, you can continue onwards to the next floor by witnessing Windigo go crazy.
On the next floor, there are a number of chests, magisters, and even barrels and crates to loot. But don't forget to break into the locked room. You should deal with the Source hand before that if you intend to kill those magisters, but it's entirely possible to persuade them as well preventing any combat from occurring. Though you could simply kill them afterwards even with that being done.
There will be a Magister with a note and key in their inventory behind a small wall of fire. Get that key and open the door with a skull painted on it to witness some tentacles breaking into the ship and releasing some deathfog. Do not enter the deathfog if your character is living. Undead are unphased by it.
You should proccede to the Deck now where you'll be attacked by a couple voidlings. Dispatch them, before deciding if you want to try getting the EXP from the captain and Magister Knight at the helm of the ship. If you act quick, or summon your incarnate near the oil barrel, you can intiate combat before the tentacle can ignite the oil and kill them both.
Go interact with the lifeboat afterwards, and agree to go rescue the others. Use the ladder to return to the first part of the ship, and dispatch the Voidlings that appear here. With them dead, should Magister Siwan yet live you'll have a chance to go try to help her if you so desire or continue out to go for the life boat. Either way, you will end up at The Starting Beach afterwards.
End of The Hold
Currently, the most amount of experience you can leave The Hold with is 3,100 giving you a strong start at level 2, and 1,100 EXP towards level 3. Gold and items are highly variable, but if you are lucky you can leave the ship with a full set of level 1 basic gear. Weapons included.
Fort Joy Beach
- 1,420 Potential EXP
Fort joy beach
You'll arrive on the shore regardless of where you were when the boat sank. Gather your bearings and unlock the nearby waypoint before exploring the general area. There is a boy named Tam, as you should do with every NPC you come across, talk to him, trade with him. You never know when a NPC has something of value, and if you were hoarding things from the boat, this is a good chance to offload the useless stuff for something that might come in handy.
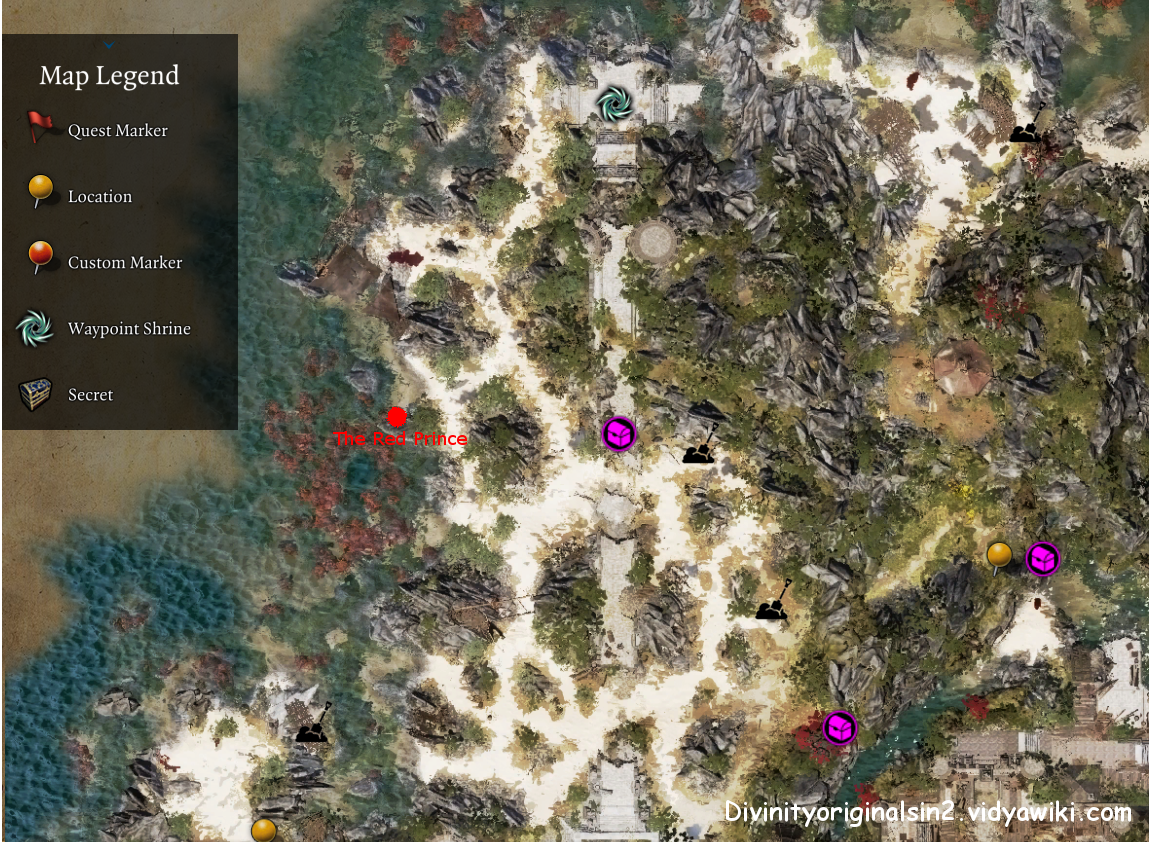
You should quickly spot a couple of voidlings along the beach, kill them. Once they are dead, you can go talk to The Red Prince if you want, or completely ignore him if you'd rather not (Or someone in your party is playing him). You can continue exploring south until you reach a wall, I do not suggest entering here yet, and carefully avoid getting too close to the group at the gateway as you explore.
You should quickly spot a couple of voidlings along the beach, kill them. Once they are dead, you can go talk to The Red Prince if you want, or completely ignore him if you'd rather not (Or someone in your party is playing him). You can continue exploring south until you reach a wall, I do not suggest entering here yet, and carefully avoid getting too close to the group at the gateway as you explore.
That lady is Dallis, and you'll be giving her a real bad time soon. But not yet. Right now you need to focus on getting equipped and getting stronger. There should be a barrel near the broken bridge, be sure to gather the Yarrow Flower growing near it. From that barrel head eastwards, by now a Black Cat should have started following you.
The Cat can become a summonable if you can keep it alive through the entirety of Fort Joy and make it to the Hollow Swamps with the cat. Regardless near here should be two digging spots. One will have the Dusty Pouch. The other will have the Freshly Buried Corpse. If you cannot dig for some reason, the middle section of the broken bridge has a shovel on it you can collect and use to dig.
Once you have those, travel closely along the wall on the east side of the Beach, you should notice a Hidden Alcove and a tree that has a Chest hidden behind it. Collect the loot from the chest before heading into the Alcove. You should see Fane momentarily and can decide if you want to talk to him or not.
Once finished with Fane, you can either ignore the poison and power through it to climb the vines, or you can burn it away letting you climb without getting poisoned. Coral and Unnis are here. Talk with them both, be nice to Coral and take advantage of Unnis for some minor goodies and EXP.
Continue past them to reach the Turtle Beach part of the area where the three turtles will attack you. Kill them before exploring the beach, there is a dig spot hidden along the shoreline closest to the east side, and a locked chest on the west side.
With everything you can currently reach looted, you can either enter Fort Joy Ghetto via the front gate where the big group is at, or you can climb up the ladder that is somewhat hidden just west of where the group is at. If this is your first playthrough just go through the gate as there is lore to be learned, just be aware you miss out on a Unique Item, Achievment, and a decent Chunk of EXP if you set off this event now. Taking the Ladder and avoiding trigger the event will allow you to get all three of those things in time.
First Revisit
- 1,800 Potential EXP
You should be returning here once you have either the Teleportation Gloves, or the Teleportation Skill Learned. Start at the Beach Waypoint, teleport a party member onto the broken part of the bridge and fully explore that area, including the somewhat hidden path to the Mountain Top. Return to the Hidden Alcove afterwards, and look around until you see the hidden chest by the rainbow. Teleport it over to yourself and open it for some decent loot.
Odds are you are also nearly completed with The Teleporter Quest. You can complete it if you so desire by teleporting Gawin across the gap as he asks. Be aware he WILL leave you behind, so put oil down across the gap first if you can. Bring an Oil Barrel if you do not have Fossil Strike yet and teleport it across the way, then use anything that makes fire once you gain the quest EXP, and enjoy some extra EXP at the expense of someone that was going to leave you to die. If you follow the tips your character gives you, you will end up inside the Underground Tunnel from here.
Dallis Revisit (optional)
- 11,180 Potential EXP
The attempt to fight Dallis and her crew. Do not take her or them lightly, as they will completely curb-stomp you if you are not absolutely ready. You should be level 4 with a large number of skills aqquired before attempting this, and even then you should probably have decent gear as well.
Set up well in advance. Tar pits blocking easy access to your characters, characters in high ground to give yourself as much of an advantage as possible, do not be afraid to use consumables at any point in this fight as they can determine the course of battle.
Once you have prepared as much as you can/want to. Begin the fight by preferably seperating Dallis far from her goons into a location you already prepared for your allies/party to ambush her at, with hopefully a massive field of oil in between her goons and that location. But make sure that Atusa is still within sight of one of your characters until she is dead.
If you cannot take her down in two turns, reset to the last save and get stronger before trying again. Because if the combined might of essentially your entire party isn't enough to reduce her to half health, then you cannot hope to survive her goons when they arrive.
When she falls below half health, get your team away from her otherwise they will ALL be knocked down. When she leaves with the Bishop, take out her pets ASAP because even without Dallis they can hit like a truck and will take out your team in a few turns if left unchecked.
With a bit of luck and skill, you should be abl to take out both Hammers Pets, Magisters Timery, Hansa, Sevek, and Borris. Collect your golden hammer and bask in the glory that is you for you having beat Dallis at likely half her level!
End of The Beach
If you successfully completed everything mentioned above, you should obtain a total of 14,400 EXP from the starting beach.
Fort Joy Ghetto
- 8,880 Potential EXP
Quests you may find in this area include:
- Every Mother's Nightmare
- The Shakedown
- The Murderous Gheist
- The Imprisoned Elf
- Withermoore's Soul Jar
- Blood Memories
- Artifacts of the Tyrant
- Signs of Resistance
- Saheila's Signet
- The Teleporter
- The Arena of Fort Joy
Assuming you entered via the Wall Ladder, talk to Magister Yarrow to initiate The Merderous Gheist. Have a human party member talk to Fara to start Every Mother's Worst Nightmare, have said same character talk to Jeth, then talk to Fara again to complete Every Mother's Worst Nightmare. That done go and unlock the waypoint before talking to the Elf Elodi.
For the maximum experience gains, talk the thugs out of fighting her then have someone add Ifan to their party if anyone wants him. Then attack and kill both Kana and Burro for their exp. Go talk to Nebora who should be within sight now and learn that she can possibly remove a collar. (The Shakedown)
From here go west near the big bonfire, Gawin should talk to you as you approach. Accept his quest (The Teleporter) then continue through the breach in the wall towards the crocodile location on your map. You should come across a crab named Septa along the path, kill him for some small amount of EXP.
You should be near the crocodiles now, sneak and set up your position before having everyone unsneak, or have your most durable character charge in and have all your teammates/party members uncloak by doing their most powerful attack/skill. The crocs should fall rather quickly.
Loot the area. You should find a journal that gives you the Vault of Braccus quest and the Teleportation Gloves. You're not going to continue The Teleporter quest yet however so continue along the beach until Narin confronts you (You should still have the Red Prince in your party). Kill him for some decent EXP, look for Margo she should be nearby and will give you an item for letting her talk about her family.
That done look for Baladir and Saam, they should be arguing nearby. If you talk to them, Baladir WILL kill Saam, so I suggest you shorten the process and kill them both. More experience that way anywho, try to time it so no other camp members get aggroed though. Do not kill Laslor or Rezik yet and flee if they are initiating combat with you.
Once you are done with Baladir and Saam, head south past their tent and have Ifan talk to Buddy to initiate Finding Emmie. He should unbury a key for you as well. Head east from here till you spot Doctor Leste and Dain. If you have a restoration on a character, separate that character from the party, and have The Red Prince talk to Doctor Leste. Have The Red Prince give her the booze but remain in conversation. After the booze have been given to Leste, have the character with Restoration heal Dain. For even more EXP, have The Red Prince ask if she has any potions, then use his special dialogue about the Yarrow Flower.
Dain should be talking to your healer, and should give you the Sparkler Card once you exaughst dialogue with him. Continue from here to the east. You should have a Yarrow flower by now, give it to Migo when the option is available and he'll give you his ring. (The Murderous Gheist) Go to the Camp Kitchen now where Griff is. Talk to Sebille and have her join if you want her on your team, or otherwise ignore her or possibly even kill her.
Go talk to the elf Amyro to initiate his quest (The Imprisoned Elf), though technically Griff gives it to you. Talk to the elf again, show Griff the Sparkler Card then talk to everyone in the Camp Kitchen. Once done with that go talk to Nebora and you should learn that she can remove a collar. Return to Magister Yarrow now and give her the ring. Talk to the Card Sharks next, use the sparkler but do not mention how you got it for some decent gold and avoiding the fight.
You can then immediately kill them all for the EXP, which I suggest. Go from here to Stingtail, make sure you leave Sebille far away as you deal with him. Check the Marked Crate near him, before talking to Stingtail himself. You will need persuasion to get him to willingly give you the oranges which also gives EXP, but regardless of how you obtain them, do not kill stingtail.
Send one party member to Griff with the orange, tell him who stole it, then attack Silence with your party when she attacks Stingtail. Talk to Stingtail afterward (Make sure Sebille is far away) for some EXP and gold reward for saving him. From her return to Migo, and talk to Magister Yarrow for your reward (The Murderous Gheist).
Once you obtain it kill Migo and Yarrow. Be warned, Migo is healed by poison. Try to either always keep him on fire or otherwise prevent there from being poison as much as possible. When you have won, you should go to the Cavern and complete everything for the initial visit there.
First Revisit
- 760 Potential EXP
After you complete everything in the cavern, you should go talk to Gawin again now that you have the gloves and send him on his way to the Alcove, but do not follow him yet. First, you need to start clearing out some NPCs in the area, but be careful to avoid getting Rezik or Nebora irritated. I suggest taking out Brother Bire, Dominic, Fara, Jeth, Myra, and Vissar. You can kill Laslor if he gets into the fight, but mostly you are just trying to clear the area out for when you eventually fight Dallis the Hammer. Do not attack any Magisters yet.
Once the generally area is clear and you can sneak from the Waypoint all the way up the ladder without being detected, from a number of angles, you should be good. Go to the Arena of The One now. (The Arena of Fort Joy)
Second Revisit
After completing the Arena of the One, go talk to Nebora and have her remove one Collar from 'The One.' Be sure to keep that character out of sight of Magisters for the remainder of your time in the Ghetto. Generally keeping them in the Kitchen will keep them safe. You should either be very close, or at level 4 by now. Regardless, there is a bit of EXP you left in the Arena of the One you should go and collect now.
Third Revisit
- 4,080 Potential EXP
There isn't much left to do now, search for Margo and kill her. Most of the items around the Ghetto should be unclaimed by now, go gather the vast majority of them and sell them to Nebora or one of Griff's Merchants. You should be level 4 by now, so go collect all the skillbooks you want from the merchants. Once you have everything you want from the merchants, you can begin slaughtering them all. Nebora, the entirety of Griff's Crew, Maol, Stingtail, Doctor Leste, and Dain if he isn't already dead. Try to avoid aggroing the Magisters for the moment. And set up the area in preperation for fighting Dallis for the first time. Also open the secret passage Wither had told you about, but don't enter it just yet.
Note: If Sebille is in the party, talk to stingtail with her nearby when you intend to kill him. You can trade with him just before you would kill him. DO NOT FINISH SEBILLE'S DIALOGUE OR YOU GET NO EXP. Look for the dialogue that mentions Griff, and attack him then, that way the quest progresses, but you still get EXP for killing him.
Fourth Revisit (optional)
- 2,800 Potential EXP
Once you return after beating Dallis, go around and murder the hell outta every single Magister that you see. Kill them, kill their dogs, bunrn everything they love and cherish to the ground. Leave only Rezik, Laslor, Maol, and Mona to remember your deeds on this place, and recall the day you crushed these magisters like the puny insects they are. Once finished flexing your newfound power, reminice that once you were nervous about attacking these people. Your business here is done. You should only come by now to sell thins to Rezik, Maol, or Mona from now on or if traveling to one of the areas connected to the Ghetto.
Be sure to return to the Starting Beach at least once before moving on to claim things before unreachable thanks to teleportation.
You should now go to the beach where Migo was and uncover the entrance the Elves told you about before coming back, then going into Withermoore's entrance instead. This will take you to the Underground Tunnel.
End of The Ghetto
If you have completed everything listed above, you should have managed to gain a total of 16,520 Experience from the man
Cavern
- 3,480 Potential EXP
If Lohse is in your party, send her outside while you talk to the elves. Have someone other than The Red Prince initiate conversation with the Lizard Kalias, as he strongly dislikes The Red Prince. Once you are finished talking to the Elves, go break through the blocked off section.
You should gain some EXP after you get past the initial poison, not far beyond that you should see a small circle slightly off your path in the minimap. This is Mody's Secret Area, and you get some EXP and items from teleporting a party member up there. If playing multiplayer, everyone has to go up there to get the EXP.
Return to the path, and continue until you get ambushed by frogs. Kill them with extreme prejudice, and try to avoid their corrupted ooze. Return to the elves once finished for an exp reward. Talk to Mody now and comes with the Hide and Seek. The first time he will be visible, the second time he will be invisible. He'll be near the ladder you can climb but further into that alcove.
Once you find him, he'll reveal a mound of dirt you can dig up if you don't have the wits to do so yourself. Dig it up and Enter the Forgotten Cell. (Withermoore's Soul Jar)
First Revisit
- 760 Potential EXP
Once you no longer have a need for them, you can kill all the elves in the cave as well as Kalias. The children, however, cannot be killed, though Mody should still be with Withermoore. Only do this when you are sure you need nothing more from Kalias.
Note: This may have long-term consequences in-game in regards to Sahelia.
(she will have a role in Act 2)
End of The Cavern
If you have done everything listed above, you should have gained a total of 4,240 EXP from the cavern as well as a number of items from the different characters here.
Forgotten Cell
- 720 Potential EXP
You gain some experience simply for entering the Forgotten Cell, once inside go talk to Mody, and then to Withermoore. When he asks, have your character with the highest strength pull out the spear, and hold onto that its part of the fabled Braccus Set. Withermoore should give you his quest to find his souljar. Agree to his terms and return to the Ghetto for now. (Withermoore's Soul Jar)
First Revisit
- 1,400 Potential EXP
The only reason you should revisit this place is to break Withermoore's Souljar with him, which I suggest you do so you can get his belt anyways.
End of The Cell
If you have done all this, you should have gained a total of 2,120 EXP from this area alone.
Arena of The One
- 1,560 Potential EXP
Loot the pots around once you load in before talking to Mia. Tell her you're a believer, and she'll wave her arms in the air before giving you a buff that lasts for 50 turns. Talk to the Thorny One and assent to fight in the tournament for The One.Destroy your enemy, before taking on your friends if they don't wish to allow you to be The One. Once a victor is decided return to the Ghetto.
First Revisit
- 3,360 Potential EXP
During your first and last revisit, kill all of the competitors. Try to keep Gordon away from your DPS as he hurts. But they should be easy enough to mop up. Loot whatever remains before carrying on to the Ghetto once more.
End of The Arena
Once you've done everything here, you should have gained a total of 4,920 EXP, a sizable amount considering how little there is to be done here.
Underground Tunnel
- 3,840 Potential EXP
After doing your initial visits via the Beach Elf entrance and Withermoore's entrance, you'll stick with Withermoore's entrance be sure you hit the lever to open the door rather than using a lockpick on it. If you are completing The Teleporter, the character/person doing that should complete it at around the time you go past that Cell. For the moment the only four things you need to worry about are the Magisters at the end of the hall interrogating Deloris, Vasyna, Verdas, and the Caved In Holding Cell.
The first thing you should do is deal with the Houndmaster and his goons. Try to teleport the oil where it won't light Deloris on fire since you want him to stay alive. Destroy the other Magisters with extreme prejudice. Once they are nothing but corpses use restoration or the dialoge option to give him a healing potion to heal Deloris. He'll give you some information before running off. (Unsude if you can get EXP from killing him)
Now loot your goodies, and go explore that caved in holding cell. That done go open all the cell doors and loot everything within them. Do not go through the hole in the back of Vasyna's cell yet. You can talk to both Vernas and to Vasyna if you want but don't expect any help from either of them currently. That all being done, climb the stairs and prepare to enter Fort Joy Prison.
First Revisit
- 3,600 Potential EXP
You can return to try healing Vernas anytime after you leave, though I have no confirmed way to remove Decaying from him currently. Aside from him, there are the Fire Slugs you can deal with. You can get some dialogue with them if you have Pet Pal, including a note you can only get via dialogue with them. You can still kill them afterwards for the EXP and epic item.
End of The Tunnel
Once you've finished everything in the Underground Tunnel, you should have gained a total of 7,440 EXP.
Fort Joy Prison
- 14,680 Potential EXP
You should enter via the Underground Tunnel. Immediately start weeding out the Silent Monks one by one. But be careful not to get within range of the Magisters yet. Once all the Silent Monks in the hallways are dead, go talk to the Magisters with one character and have the others set up to ambush the Magisters as they try to leave. Do as Deloris instructed and tell them about the Madam, but DO NOT tell them that Deloris is the one that told you.
You'll get some EXP when Han talks to that character immediately after. Swap to one of your other characters and fight the two Magisters. They should go down easily. With them down, loot the area then go and talk to the Hounds. If you have Pet Pal, tell Emmie about Buddy. This'll give some experience, and you can still kill them afterward if you want.
Enter the Houndmasters room for some EXP, then open Birdie's cage with the elaborate key for some more EXP. Persuade him for another batch of EXP before making your way into Kniles Playground. Kill him and all his pets with extreme prejudice. He can be difficult so split up your party and prepare appropriately.
With them all dead, leave Hans alone for now and go near the stairs you entered at. Look for a Lever near there, and use it. This will reveal the way to the Ancient Passage. Enter and take care of business there. Once you return, go UP the staircase just near there.
First Revisit
You should only return once Fort Joy is completely Empty of Magisters and anyone else you intend to kill. You'll talk to Han to leave the Fort and enter the Hollow Marshes.
End of The Prison
At the end of the Prison you should have obtained a total of 14,680 EXP if you followed this guide.
Ancient Passage
- 3,480 Potential EXP
You will immedietly gain some EXP for entering the place. There are two fights in this room initiated by you interacting with Souljars. Facing towards them all from the stairs, the farthest one, and the closest one on the right will initiate fights. One will have all melee skeletons, the other Magic Skeletons. They can be healed to death if you so please.
The Souljar furthest on the left side is Withermoore's. Pick it up either before or after interacting with it. You'll be bringing it to WIthermoore himself. Climb up the ladder where the Aeromancer Guardian was. Interact with the statue and scratch it. This should drop the Braccus leggings.
Loot the tomb before leaving, and provided you did both fights with the skeletons there is no reason to come back.
End of The Passage
If you did everything you could here you should gain a total of 3,480 EXP.
Fort Joy Proper
- 14,940 Potential EXP
You should immediately see someone talking to magisters outside the building you are in. Turn completely away from them and enter the part of the building behind you. You should encounter High Judge Orivand here. He will start some dialogue with you, I suggest you iniate a fight with him though you can learn some lore via the dialogue.
Kill him and his goons, prioritize Orivand and his mages. Once they all go down, go raid Orivand's room. There is a Teleportation Tome in there and I am sure that'll be useful to at least one member of your party. Take whatever you want from the area before returning to where you first entered and exit the building to help Paladin Cork.
There are Six Magisters in this courtyard area. Keep Paladin Cork alive and destroy them all. Be aware you cannot get EXP for both saving and killing Paladin Cork here. YOu can only do one of the two, and saving him now is a net gain overall.
Once Paladin Cork is saved and talks to you for a moment, he'll vanish leaving you to loot the area. One of the Magisters should have a key for the gate to the Harbour. Open said gate and you should recognize this as where Gawin abandoned you at. Continue unitl you no doubt spot his corpse and the Magisters responcible. Kill the Magisters, but be careful to avoid having them hurt the Silent Monks. You'll want to kill them yourself for the EXP.
With all the Magisters dead, loot the area before locating the crank to lower the draw bridge, then return to the Prison to talk to Han and enter the Marsh.
End of Fort Joy Proper
If you have done all of the things listed above, you should gain a total of 14,940 EXP.
Hollow Marshes Part 1
- 15,800 Potential EXP
You'll gain some EXP for entering the area with Hans. He should talk to you giving you options for how to proceed. Explore the area along the beach and collect whatever loot you can, there isn't much but you might've burned some items on one of the previous fights. Slowly head north. You should notice a few paths leading east. One will have strange bulbs, another will have undead, and once you pass the Lucian waypoint you should come accross Zaleskar.
He is a good place to sell and buy gear, so do not kill him now. If ever. Once done talking with him, continue north. You should see a Source Hound, but ignore it for now. You should hear some kind of magical discharging going on. It is Windigo, way back from The Hold. Thank her for her courtesy by killing her and talking to her rat. You should also search this island as there is a dig spot. Continue north along the beach until you spot another small island you can walk to. There should be another dig spot here (Might be on you minimap), then continue further still down the beach. You should eventually run across the bottom of a tower, keep this location in mind for later because there is a piece of the Braccus set in it.
Return to the Source hound and talk to it and learn what happened. Kill it afterwards for some small EXP. Do not bother with the undead for now and avoid getting too close. You should take the Bulb path the first time through. Teleport them out of the way of your path as you go through, but keep an eye on the right side of the path for a dig spot, and for the impaled heads.
When you reach the impaled heads, teleport ALL of the bulbs away out of the water and FAR from the chest. Once every single bulb has been moved, get rid of the water via contamination then fire. Then, and ONLY then should you open the chest. With the loot obtained, continue onwards until you come across a small ruin.
Some Voidlings will attack you here in three waves. Three in the First, Four in the Second, and Five in the Final wave. Once they are handled, look around the ruins for some more of those noxious bulbs. Teleport them out of your path and get rid of the lingering poison afterwards. Ring the bell and Bahara will come talk to you. Mention you saved Hans and she'll throw down a rope letting you climb up and enter the Sanctuary of Amadia.
First Revisit
- 7,560 Potential EXP
You should have left out the other side of the Santuary of Amadia, so not far along the beach should be a few Void Salamanders. Kill them before continuing along the beach, there should be a dig spot in the wrecked ship. You should continue until you see the illusionary cave entrance. Don't enter that yet, head from the beach to the area you were attacked by the voidlings before heading north. You should find some flaming pigs, have someone with Pet Pal talk to them and persuade them that you'll help them.
After succeding both Persuasion checks, the pigs should stay still making it easier to bless them later on. From the pigs head east, but be careful. A massive ambush lies in wait for you. Split your party up and take whatever ground you need the individual members to take. Kill the undead first with either healing spells of via brute forcing them down with magic or physical damage. Take out the Void-Dweller as quickly as possible afterwards.
Once the area is clear, go up to where the void-Dweller started and interact with the Statue to enter The Hall of Echoes for the first time.
Second Revisit
- 6,300 Potential EXP
You should now have Bless on all your characters. In the Early Access this costs no Source, it supposedly will cost 1 Source in the Full Release. So I would suggest not revisting the pigs yet, but instead continue north to where there is a blind Magister named Loke.
Against what you likely want, let him try to shackle you. Before he can succede, a number of undead will attack. They can be rough so save before you talk to him, or while talking to him. Regardless you can kill Loke afterwards for some more EXP. Slightly to the east is a bear cup you can kill for minor EXP. Afterwards, you should head west to the two points you saw undead earlier but didn't attack them. Now you attack them before heading up the vine near a dead magister to the area Tarlene is at.
Head past her for now, and teleport a character with HIGH Magical armour into the electric cloud filled tower. Have them quickly grab Braccus's Boots before getting them the hell outta there. With the boots obtained, save. Gareth SHOULD be fine, but you do NOT want him to die to the magisters.
Go to the Lucian Waypoint and return to The Sanctuary of Amadia Waypoint, but do not linger, you need to go to the Illusionary Cavern entrance you discovered earlier and enter The Dark Cavern.
Third Revist
- 10,080 Potential EXP
You should have obtained a Purging Wand from the Dark Cavern. Time to start making use of it. Return to Tarlene and kill the Shrieker with a single cast of Source Vampirism. You do not want to use the Source Vampirism too much as for the moment your ways to get source are VERY Limited.
With the Shrieker killed, Tarlene will help you assault the Magisters in the ruins. Kill them all and kill them fast otherwise they WILL kill Gareth, and that is not something you want to happen. Once the Magisters are dead, and Gareth is still alive he'll return to The Sanctuary of Amadia. You'll be going there soon, but first explore the Decrepit Ruins.
Fourth Revisit
- 5,400 Potential EXP
With the Mask of Braccus obtained, you should be able to get enough source between the Wand and Helm to bless all the flaming Pigs, so make use of the Magisters you left dead. Not lot they were doing much with their souls to begin with. Try to avoid using the Mask 4 times since I believe a level 8 demon will spawn when you've used it 4 times. You want to save him for later on.
Bless all four pigs, and a skeleton named Scapor will appear. Mislead them into leaving you be for the most experience. You cannot get the persuasion EXP and the EXP for killing them. And the persuasion EXP is the best option if you have it.
The pigs all blessed and skeleton takken care of, loot her bones for the Torch of Braccus. You should have the boots, legs, chestpiece, helm, spear, ring, and now mace of Braccus. Head south and near the ruins you fought the voidlings should be a vine you can climb leading to a crumbled building. Otherwise known as the Gargoyle maze.
Since you have the Band of Braccus you can skip the entire thing by showing it to the gargoyle. I suggest you do this at first. Once past the maze, you should enter the Necromancer Tower.
Hollow Marshes Part 2
Fifth Revisit
- 2,940 Potential EXP
Having completed the Necromancer Tower, talk to the statue just outside and it should send you back to the start of the maze. Enter the maze itself now using the first flaming skull to open the door to the room with the Historian. Three flaming skeletons will attack you. Use healing spells, or hydro spells to deal with them, but DO NOT USE FIRE!
You will need at least one source to help the Historian. I suggest using one of the charges from the wand if any remain on one of the many dead magisters about. If none remain, use the Mask instead. You should have only have cast bless a total of 7 times before this, meaning you will likely summon the demon if you hadn't already.
Try to set up for this and drain a Magister near some high ground you can make use of, and rain hell upon it. Once the demon is dead, loot it before blessing the blood under the Historian before blessing the Historian himself.
You aren't done yet though. Now you will head back to where you found the bear cub and head a bit further east. You should see Feder the Pig. Tell her to go to The Sanctuary of Amadia, and remember this spot for later. You'll be coming here again.
With all of this finally done, you now should return to The Sanctuary of Amadia yourself for the First True revisit.
Sixth Revisit
There is not much left to do. If there was anything that needed Source to complete, your wand Should be refreshed now so go drain some magisters to finish them, and top your characters off in terms of Source. You'll refill it once more before leaving the Island unless you really enjoy palying with Source Powers. Return to the place Feder was as a pig and continue on that path.
You should see a dragon named Slane there. Breach the chains that bind him and agree to help him. If you truly intend to help him prepare for a difficult fight as you head to the end of the beach he is on and into the skull shaped cave known as the Witch Cave.
Seventh Revisit
After Exiting the cave, no doubt worse for the wear. You have a choice. You can return the wand to Slane and he'll help you a when you attack the magisters in a few moments from now. Or you can kill him for Experience. This is the only case where I will not include the Experience in the Potential so you can make an informed choice when deciding this.
If you give him the wand, he will kill Five Shriekers blocking entrance ways into the Fortifications where you will be attacking the Magisters and you gain 120 EXP.
If you keep the wand (A second Purging Wand), and kill him you have to deal with all the Shriekers yourself, but instead gain ??? EXP. Be warned, he hits HARD.
Once you have decided what to do and successfully accomplished either goal. Return to the fork in the road and rejoin with Gareth and his crew. Use all the charges remaining on your purging wand(s) and have Gratiana refill them.
You'll notice every Seeker you healed is here, as well as a number of others. On the by and large they will not be entering the fight about to come, but if they are not at full health, top them all of with a restoration or two. You should still have Migo's Ring given its a quest item and cannot be sold.
Once you have fully prepared yourself you are ready to begin the Final Push. Make sure you have done everything else you want to on the island before moving on.
End of Hollow Swamp
If you have completed everything listed above, you should have gained a grand total of ??? EXP from everything.
Sanctuary of Amadia
- 300 Potential EXP
As you enter, talk to Bahara. If the Red Prince is in your Party he can benefit from talking with her in his personal quest. That done continue onwards and talk to Han and the Lizard caring for him. You can give Han a potion to help him feel better but it has neither benefits nor consequences other than spending a single potion.
You should see the woman Simone just past them tending to the wounded. Talk to her and insist on helping. You should still have Migo's Ring so even if you do not have the Restoration Skill learned (At least One character should know it by now), so make use of it to heal Jules, Klaud, Matis, then Simone herself. Once you are all finished healing them, you can talk to Simone once again.
Continue down the pathway and talk to Exter. He should tell you about Gareth. Agree to help find him before carrying onwards. Talk to Dysan and Leya with everyone in your party, as they will give more inofrmation on removing the collars. Once done talknig with them, talk to Gratiana to leanr more about where Gareth is exactly as well as the Goddess Amadia. I suggest you be nice to Gratiana as for the entirety of Act 1 she is your ONLY way to replenish Purging wands.
Interact with the Statue of Amadia after talking to Gratiana and be supportive of it in order to bless the water there. This is important for later on and can effectively nullify any damage sustained during fights by running through it.
You'll talk to Kerban afterwards, you can obtain a unique rapier here though you will need to repair it. Its not a great weapon, but clearly has some realm of importance to the character and who knows what'll happen if you actually kill Dallis with it.
First True Revisit
- 4,200 Potential EXP
Your first real revisit to the place you actually will want to put the helm of Braccus and Purging wand on the ground before talking to Gareth. He'll suggest you talk to Gratiana to find the very same purging wand you set down. Go pick it up as well as the helm again and offer her the Souljar that be hers.
She will now recharge your Source Wands when they are empty, which the wand should be by now so recharge it. Feder the Pig should also be here so go talk to her. Tell her she should soak in the shrine's water and she will turn into one of the best merchants in Act 1, provided you interacted with the statue earlier.
With these things done, talk to Leya with a character that still ahs their Source Collar on to get them all removed once and for all. With that your should be good to return to the Hollow Swamp.
End of The Sanctuary
If you did everything properly, you should gain a total of 4,500 EXP from The Sanctuary of Amadia.
Hall of Echoes
- 600 Potential EXP
Certain events will occur here that will end with you obtaining the Bless Skill. In Early Access this skill costs only AP, but supposedly in the Full Release it will additionally cost 1 Source Point. After obtaining this skill, you will be returned to the Statue you interacted with.
Dark Cavern
- 22,860 Potential EXP
Upon entering you'll gain some EXP. begin exploring the area, but on the by and large ignore Trompdoy. You can loot everything jsut be aware most things are illusions. There is a illusionary bridge behind the illusionary crates. And yes you are going to be SICK of that word very soon.
As you venture deeper into the cavern Trompdoy will assail you with yet more illusions of himself. Three for this first fight. There are a few secret paths hidden around. Check the walls carefully, and always double check the minimap.
You should eventually reach a rat and a statue. The rat gives a hint about the statue, and should you successfully figure out the riddle you gain some EXP adn the proper door opens. Though one of the 'fake' doors has some loot behind it.
Once you take the proper way through, Trompdoy will attack you again. This time additionally with his real self. I do not know for certain if killing the illusions here grant EXP, but I will include what I obtained at the end of the fight. Focus on killing the real one ASAP otherwise. If you wish to compare numbers, when I killed the real Trompdoy I got 2400 EXP for killing him, followed by 7200 as his illusions all vanished and the journal updated.
Once you enter the Vault, go wild and take whatever you can. The chestpiece of the Braccus set is also located here. Pick up all the souljars here minus the Illusionists. As you approach it he will implore you to smash his souljar. I suggest you agree and do so given the EXXP reward. Also make sure you take the Purging wand, that is the singular MOST IMPORTANT item in the vault.
With all your loot obtained, you can pull a lever to shut down the barrier and leave at any time.
End of The Illusion
If you did everything right, you should have obtained a total of 22,860 EXP from the Dark Cavern.
Decrepit Ruins
- 2,400 Potential EXP
As you enter you will spot a decaying Magister. You cannot save him, nor should you want to once you realize what he was going after. Regardless with Purging Wand in hand, you should be able to drain three dead magisters and use 1 Source to bless the Lever. With the lever no longer cursed, you should be able to carefully manuver a singe character to use it. Successfully activating the lever will grant some EXP.
Once you have done that, teleport a character with source and bless over the cursed blood. (Repeat for multiple Players). You should gain EXP upon entering this room. Have a character with Source Bless the object that you are clearly meant to interact with before using the third Source Point while interacting with said object.
After a moment the Helmet of Braccus will be available for you to grab. It also gives Source Vampirism just like the Purging wands, but with a catch. If you use it too much, a Demon will spawn intent to stop your shenanigans. Save that encounter for later on regardless and try to use the helmet sparingly. With these tools in hand, return once more to the Hollow Swamp.
End of The Ruins
If you completed everything above, you should have obtained a total of 2,400 EXP from the area.
Necromancer Tower
- ??? Potential EXP
Upon entering the Necromancer Tower, you should quickly spot the three skeltons for which the place is named. Go talk to them, with a persuasion check you can avoid a fight and obtain their quest. I am not sure if this was bugged for me but I obtained no exp doing this quest, and as such do not have the actual numbers you can get from regularly killing them.
Regardless of how they die, oncce the necromancers are dead, you can get a key from them to open the big door. You should see a pit that has fire in it. Move an vace onto the center of the fire to stop the trap. Avoid the pressure plate and unlock the metal door near the vace you just placed. Enter and look for a pipe. Interact with it to travel to a different section of the tower. Pull the lever before returning to the area you were just at.
Carefully explore the now open doors in the area. you should eventually find yourself at a big blue barrier. Reach out to the mechanism and when prompted nteract with it using source. This should cause the barrier to drop, allowing you in to take the loot, including the gloves of Braccus. The final piece of the set you were missing.
End of The Tower
The current amount of EXP obtainable from the Necromancer Tower is currently Unknown to me.
Witch Cave
- 5,460 Potential EXP
There are a large number of traps immedietly in the start of the room. Either destroy them, disarm them, or tyyr to avoid them. But do not activate them all at once otherwise you will tak massive damage and possibly die.
Once you have circumvented the traps, the difficult part begins. You need to set up for the inevitable battle against Radeka. She will summon forth five Bloody Corpses, three Carrion Beetles, and an Undead Medat. I have no advice here except be ready to flee if or when things go south. It is a difficult fight even if you are fully prepared for it.
Consider using heaing spells on the undead, and keeping some poison spells for when you are inevitably decayed. Because it will happen at some point. And unless you want to use a sourcce point to bless someone and remove it, Radeka is just as likely to use restoration on them.
When you manage to beat her and all her minions. Loot them all for the Black Rose as well as some unique items and the Second Purging Wand that Slane wants. Combine the Black Rose with a empty Bottle to make perhaps the most powerful potion in the game. The Altar of the Black Rose. Leave the cave when you are finished looting.
Final Push
Last Minute EXP
- ??? Potential EXP
As you are preparing to leave the Reaper's Eye for good, there are a number of characters you can kill if you so desire I haven't mentioned above. I'll list them here, as well as the EXP gains from each individual NPC, provided they actally provide EXP.
The Last Battle on the Island
Until some time after the full release, this battle is where my guide will end. There is a little bit more to Act 1, but if you have made it this far I have full faith you can figure out the puzzles and tricks it offers, and can likely think of a few ways to solve any, if not all of them just beyond this last battle.
Regardless, as to the battle itself. Bishop Alexander and a number of Magisters will be in the area and you need to distract them so your remaining allies can take the boat. I suggest you take out Bishop Alexander ASAP. He is the greatest threat on the field when you first start the fight.
This will quickly change once the Void Wurm attacks. Get all but your most survivable characters OFF THE GROUND. Pick off magisters when you can, but otherwise focus all your fire on killing that Wurm. Because it CAN attack NPCs outside the building, and will if you do not keep it preoccupied. When the Wurm finally goes down, quickly loot everything you can, as you do not have much longer on the island.